Bake The Best Classic Sticky Buns: Easy Homemade Recipe & Tips
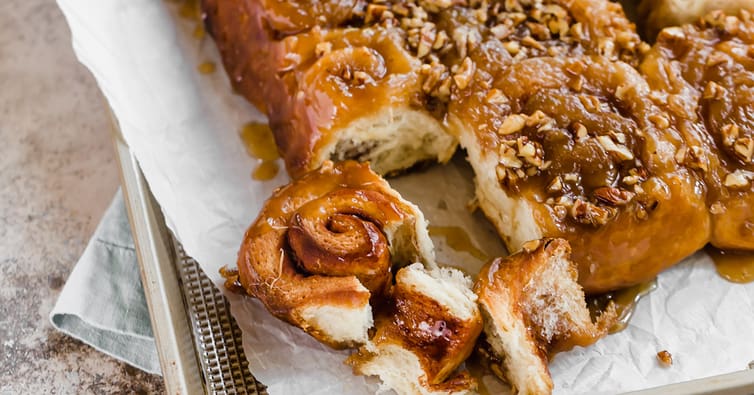
Picture this: the sweet, comforting aroma of cinnamon wafting through your kitchen, guiding you to a pan of warm, golden-brown buns. Their tops glisten with a rich, amber caramel, studded with toasted pecans, just begging to be pulled apart. This isn't just a dream – it's the magical reality of homemade classic sticky buns. A true testament to comfort food, these indulgent treats evoke cherished memories of cozy mornings and festive celebrations. While the thought of working with yeast and dough might seem daunting to a novice baker, we're here to show you that crafting these irresistible sticky buns from scratch is not only achievable but incredibly rewarding. Forget store-bought; once you experience the joy of biting into a soft, fluffy bun, its layers of cinnamon and gooey caramel melting in your mouth, you'll never look back.
Unpacking the Irresistible Charm of Classic Sticky Buns
What elevates a simple bun into a truly unforgettable classic sticky bun? It's a symphony of textures and flavors, meticulously layered to create a decadent experience. At its heart lies a "rich" dough – a tender, buttery foundation made with milk, butter, and eggs. This enriched base ensures a soft, fluffy crumb that soaks up all the glorious sweetness without becoming dense.
But the true magic unfolds with the filling and, most notably, the topping. While the interior boasts a familiar swirl of butter, cinnamon, and sugar, it's the caramel-pecan layer at the bottom of the pan that defines the sticky bun. As the buns bake, this brown sugar and butter concoction transforms into a luxurious, bubbly caramel, coating the pecans and infusing the bottom of each bun with unparalleled depth and sweetness. Upon baking, the pan is inverted, allowing this molten caramel and crunchy pecans to cascade over the top, creating that signature gooey, sticky finish.
It's this unique inversion that sets them apart from their close cousins, cinnamon rolls, which are typically finished with a simple cream cheese glaze. For a deeper dive into their delicious differences, explore our article on
Sticky Buns vs. Cinnamon Rolls: Unpacking the Sweet Differences. Whether served for breakfast, brunch, or as a delightful snack, classic sticky buns promise to dazzle with their soft texture and deep, caramelized flavor.
Your Journey to Perfect Classic Sticky Buns: The Easy Homemade Recipe
Embarking on the journey to homemade classic sticky buns is a culinary adventure that's easier than you might think. We'll guide you through each stage, ensuring a delightful experience and a truly scrumptious outcome.
Crafting the Enriched Dough
The foundation of any great sticky bun is its dough. Start by activating your yeast in warm milk with a touch of sugar – look for a foamy layer, which indicates your yeast is alive and ready to work its magic. Combine this with the remaining wet ingredients (melted butter, eggs) and gradually add the flour and a pinch of salt. You'll stir until a shaggy dough forms.
Don't have an electric mixer? No problem! Turn the dough out onto a lightly floured surface and knead by hand for 8-10 minutes. This process develops the gluten, resulting in that wonderfully elastic and tender texture. You'll know it's ready when the dough feels smooth, no longer overly sticky, and springs back when gently pressed. Place the dough in a greased bowl, cover, and let it rise in a warm spot until doubled in size – typically 1 to 1.5 hours. Patience here is a virtue; a well-risen dough leads to light and airy buns.
Preparing the Aromatic Filling
While your dough rises, prepare the simple yet sensational filling. This usually involves softened butter, granulated sugar, and a generous amount of ground cinnamon. Once the dough has doubled, gently punch it down and roll it out into a large rectangle. Spread the butter mixture evenly over the surface, ensuring every inch is coated for maximum flavor.
Assembling the Gooey Masterpiece
This is where the sticky bun truly comes alive! In a baking pan (a 9x13-inch pan is ideal for a dozen buns), spread a layer of the luscious caramel topping. This mixture is typically brown sugar, butter, and a splash of corn syrup or honey, melted together. Generously scatter a layer of pecans over the caramel – for an extra layer of flavor, consider toasting your pecans beforehand.
Now, carefully roll up your dough rectangle from one long side, creating a tight log. Use a sharp knife or even unflavored dental floss to cut the log into individual rounds, about 1 to 1.5 inches thick. Arrange these beautiful spirals cut-side down on top of the caramel and pecans in your prepared pan. Cover the pan and let the buns undergo a second rise, allowing them to puff up and nestle together, usually for another 30-45 minutes.
The Bake and the Crucial Flip
Preheat your oven and bake the buns until they're golden brown and the caramel is bubbling. The aroma filling your kitchen will be pure bliss! Immediately upon removing them from the oven, and while still very hot, place a serving platter or a sturdy cutting board over the baking pan. With oven mitts, carefully but confidently invert the pan onto the platter. The hot caramel will drip down, coating each bun in a glorious, gooey sheen. Lift the pan slowly, letting gravity do its work, and marvel at your creation. For more on achieving this gooey perfection for any occasion, see
Homemade Sticky Buns: Gooey Caramel Perfection for Any Occasion.
Expert Tips for Sticky Bun Success
Achieving bakery-quality classic sticky buns at home is within reach with a few expert insights:
* **Yeast Confidence:** Don't fear the yeast! Ensure your milk is *warm* (105-115°F / 40-46°C), not hot, to activate it without killing it. If your yeast doesn't foam, it's best to start with fresh yeast.
* **Kneading Wisdom:** Whether by hand or mixer, proper kneading is crucial. The dough should be smooth, elastic, and pass the "windowpane test" – you should be able to stretch a small piece thin enough to see light through it without tearing. If kneading by hand, use a push-and-fold motion, adding only the lightest dusting of flour if the dough becomes too sticky.
* **Temperature Matters for Rising:** A warm, draft-free environment is key for optimal dough rising. If your kitchen is cool, try placing the covered dough in a slightly warmed (but turned off) oven or near a sunny window.
* **Toasted Pecans for Flavor Depth:** While raw pecans work, quickly toasting them in a dry pan or oven before adding them to the caramel layer intensifies their nutty flavor and adds another dimension to your sticky buns.
* **Don't Rush the Rise:** Resist the urge to shorten rising times. A slow, proper rise results in lighter, more flavorful buns.
* **The Inversion is Key:** Don't delay the flip! Inverting the buns immediately after baking, while the caramel is still hot and fluid, ensures an even coating and prevents it from sticking to the pan.
* **Storage and Reheating:** Leftover classic sticky buns can be stored covered in the refrigerator for up to 3 days. While they are best enjoyed fresh, they reheat beautifully. For individual buns, a quick 20-30 seconds in the microwave will bring back their gooey softness. For a whole pan or multiple buns, cover loosely with foil and warm in a 300°F (150°C) oven for 10-15 minutes until heated through and the caramel is melted again.
* **Make-Ahead Magic:** Want fresh sticky buns for breakfast without the early start? Prepare the dough and assemble the buns in the pan the night before. Cover tightly with plastic wrap and refrigerate overnight. In the morning, take them out of the fridge at least an hour before baking to allow them to come to room temperature and proof slightly before baking as usual.
Baking classic sticky buns at home is an immensely satisfying endeavor. From the rich, tender dough to the sweet, cinnamon-spiced filling and the crowning glory of gooey caramel and crunchy pecans, every bite is a celebration. So, gather your ingredients, embrace the process, and prepare to be rewarded with one of the most comforting and delicious treats imaginable. Your kitchen is about to become the happiest place on earth!